Migration Guide to WooCommerce Zapier Version 2
WooCommerce Zapier version 2 (released in April 2020) is a major update that includes a lot of requested new features and improvements to functionality. New triggers, support for actions, and more. Please refer to the What’s New in Version 2? chapter for more details.
It is necessary for all existing WooCommerce Zapier users to manually migrate their existing Zaps and Zapier Feeds to the new method.
Legacy Feeds and Zaps must be migrated by 30 April 2022
All Legacy Feeds and Zaps must be migrated to the new WooCommerce Zapier app before 30 April 2022 (2 years after version 2 was released).
Any Zaps using the WooCommerce (Legacy) app after this date are no longer supported.
The New WooCommerce App on Zapier.com
Alongside the release of WooCommerce Zapier version 2, the WooCommerce app on Zapier.com is updated as well.
To use this new app, you must be running the WooCommerce Zapier plugin version 2 (or newer).
Existing users will see that their existing Zaps now use a WooCommerce (Legacy) app. These existing Zaps are supported until 30 April 2022. However, if you edit an existing Zap, it will need to be migrated to the new WooCommerce app.
Any new Zaps must be created using the new WooCommerce app.
New Requirements
Version 2 of the WooCommerce Zapier plugin introduces the following new requirements:
| Item | New Requirement |
|---|---|
| PHP | Version 7.2 or higher (We recommend using PHP 7.4 or greater1) |
| WordPress | Version 6.0 or higher |
| WooCommerce | Version 6.5 or higher |
| WordPress Permalinks | Pretty permalinks enabled 4 |
| HTTPS | Site needs to be accessible via https:// |
| WooCommerce REST API | Running and operational2 |
Before you can use version 2, you will need to ensure that your WooCommerce store meets these new requirements.
Please refer to the System Requirements chapter for full details.
Update the WooCommerce Zapier Plugin to Version 2 (or Newer)
Before you can use the new WooCommerce app on Zapier.com, you need to update the WooCommerce Zapier plugin that is installed on your WooCommerce store.
Go to your WordPress Dashboard, then go to the Side Menu → Plugins screen, then scroll to WooCommerce Zapier. Ensure that it shows Version 2 (or newer), and not a prior version.
If it shows an older version before 2, please go to the Side Menu → Dashboard → Updates screen, and then click the Check Again button. When WooCommerce Zapier shows in the pending plugin updates list, tick it and update it.
If WooCommerce Zapier 2 still doesn’t show in the list of available updates, please read this article which explains how you can connect your Woo account to your WooCommerce store to activate in-dashboard one-click updates.
Please ensure you have successfully updated to version 2 (or newer) before proceeding to the following steps.
Migrating Legacy Feeds and Zaps
Heads Up
The following 15 Steps need to be completed for every existing Legacy Feed/Zap.
Migrating a Zap is quite an involved process, so please read this part thoroughly before starting.
- Go to the Legacy Feeds page (WordPress Dashboard → Side Menu → WooCommerce → Zapier screen → Legacy Feeds tab) and choose a Legacy Feed in the list.
Make a note of the Trigger that is being used for that Feed. -
Expand the Changes in Triggers table below, and locate your Trigger in the Old Trigger column.
Make a note of the corresponding Resource and Trigger Rule that you will use in your new Zap.Changes in Triggers
Old Trigger Resource Trigger Rule New Order Order Order paid
(see the New “Order created” Trigger chapter below)New Order Status Change Order Order status changed (any status) New Line Item in Order Line Item in an Order3 Order paid New Customer Customer Customer created Subscription Created Subscription Subscription created5 Subscription Renewed Subscription Subscription renewed5 Subscription Renewal Failed Subscription Subscription renewal failed5 Subscription Status Changed Subscription Subscription status changed (any status)5 -
Go to Zapier.com and log in.
- Find the Zap that corresponds to the Legacy Feed from the previous steps.
- Select the arrow on the right side of the Zap and choose Duplicate to duplicate it:
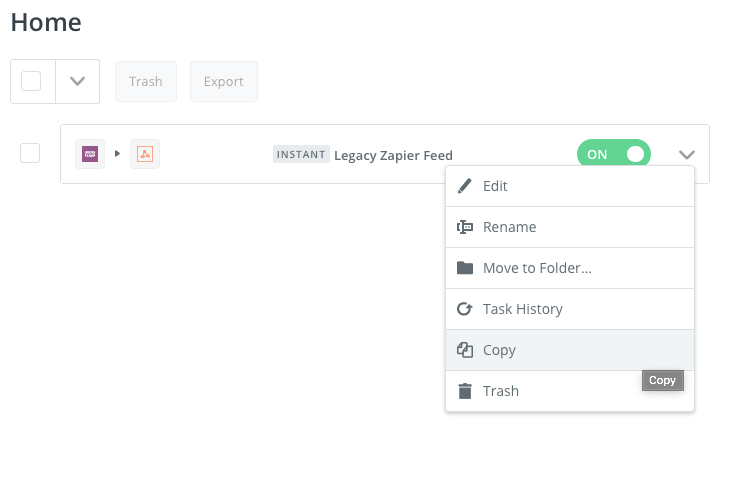
- Find the newly copied Zap, which will have the
Copy:prefix on it, and it will be off.
Click on its name to edit it. - In Step 1 of your Zap:
- In the Choose App dropdown, replace the WooCommerce (Legacy) app with the WooCommerce app.
- In the Choose Trigger Event dropdown, choose the appropriate Resource that you noted from Step 2 above.
- Click Continue.
-
In the Choose Account step, click on the Sign in to WooCommerce button to authenticate your Zapier account with your WooCommerce store.
If you are already authenticated, you can choose the previously used authentication from the WooCommerce account dropdown menu instead.Note
Use the WordPress Application Password feature to authenticate.
If you encounter issues while authenticating, please refer to our Troubleshooting Authentication Errors documentation.
- In the Customize… section, choose the Trigger Rule that you noted from Step 2 above.
- In the Find Data Step, click the Test & Continue button to retrieve sample data from your WooCommerce store.
- You’re all done with Step 1 of your new Zap.
- Open the next Step in your Zap, and review the Customize screen and make any necessary changes where you are using WooCommerce data fields. Review the Data Field Changes and Data Field Definition tables to familiarise yourself with the available WooCommerce data fields.
Heads Up
If your Zap has more than 2 Steps, repeat this for all remaining Steps in your Zap.
Experiencing a Problem?
Go back to Step 10 and get more samples from WooCommerce by clicking the Get More Samples button. Don’t forget to choose one of the provided samples to successfully update the field definitions and sample data.
-
Return to the Zapier.com Zaps screen. To avoid duplicating data in the target system, delete the old WooCommerce (Legacy) Zap.
- After you have tested your Zap and everything is working as expected, be sure to turn on your new Zap.
- Return to your WooCommerce Zapier Legacy Feeds screen in WordPress and delete (trash) the Legacy Feed you chose in Step 1. i.e. delete the Legacy Feed you just migrated to a new Zap.
One Last Thing…
Be sure to repeat steps 1-15 above for all of your Legacy Feeds.
After migrating all of your Legacy Feeds, you should have no more active Legacy Feeds showing in WordPress.
Return to your WooCommerce Zapier Legacy Feeds screen in WordPress and click on the Trash filter and the Empty Trash button to permanently remove all Legacy Feeds.
You will then see a Congratulations message in your WordPress dashboard. Click the OK button to complete the migration process.
Congratulations!
You can now explore the new features in WooCommerce Zapier version 2, including incoming Actions and Searches.
Changes in Triggers
Here is the mapping of the old trigger names to the new Resources and Trigger Rules. Complete lists of available Resources and Trigger Rules are also available.
| Old Trigger | Resource | Trigger Rule |
|---|---|---|
| New Order | Order | Order paid (see the New “Order created” Trigger chapter below) |
| New Order Status Change | Order | Order status changed (any status) |
| New Line Item in Order | Line Item in an Order3 | Order paid |
| New Customer | Customer | Customer created |
| Subscription Created | Subscription | Subscription created5 |
| Subscription Renewed | Subscription | Subscription renewed5 |
| Subscription Renewal Failed | Subscription | Subscription renewal failed5 |
| Subscription Status Changed | Subscription | Subscription status changed (any status)5 |
Version 2 has many more triggers
The 8 original triggers are now called trigger rules, and there are now many of them.
Please refer to the Trigger Rules chapter for details on all of the new trigger rules.
If you want, you can switch to a better suited trigger rule upon migrating, for example instead of Order paid, consider using Order created.
New “Order created” Trigger
In version 2 of WooCommerce Zapier, we renamed the New Order trigger to Order paid. The new name better describes the trigger event.
Alongside with a naming changes, we are introducing a new trigger rule, called Order created. This new trigger rule will fire every time when an order is received (including both paid and unpaid orders) in WooCommerce.
If you were using the New Order trigger in your WooCommerce (Legacy) Zap, consider switching to the new Order created trigger rule if your main focus is when an order is created. Alternatively, if you would like your new Zap to only act for paid orders, then use the Order paid trigger rule.
Please see the Order Trigger Rules chapter for more details.
Note
In the past, for users who are using an offline/deferred payment methods, we recommended using the New Order Status Change trigger with a filter set to status = on-hold. This is no longer the recommended approach. Instead, we recommend using the new Order created trigger rule, which fires every time an order created, regardless of the payment method.
Plugin Interface Changes
The WooCommerce Zapier user interface inside WordPress is completely redesigned in version 2.
Please refer to this table below for details. You can click on the new names to see the corresponding part of the User Guide, and see where the interface is located in your WordPress Dashboard.
| Old Name | New Name | Notes |
|---|---|---|
| Zapier Feeds | Legacy Feeds | You are no longer able to create a new connection with the legacy method. |
| Order Notes | Resource History | Support every resource, except Customer. |
| Status Screen | Status Screen | Zapier information extended and grouped towards the bottom of the screen. |
| Logs | Logs | No changes. |
Legacy Feeds screen
When you delete your last Legacy Feed and empty the trash, the Legacy Feeds tab will disappear from WooCommerce and will no longer be accessible.
Resource History box replaces Order Notes
For new integrations, the WooCommerce Zapier plugin no longer adds to the Order Notes section.
Instead, the activity is displayed in the WooCommerce Zapier History box at the bottom of the view/edit order screen. In fact, every Resource (except customers) has a WooCommerce Zapier History block.
Your existing Order/Subscription Notes are not affected, and they stay intact in your Order screen.
Plugin Notice After Update
After updating the WooCommerce Zapier plugin to version 2, you will be prompted with the following message:
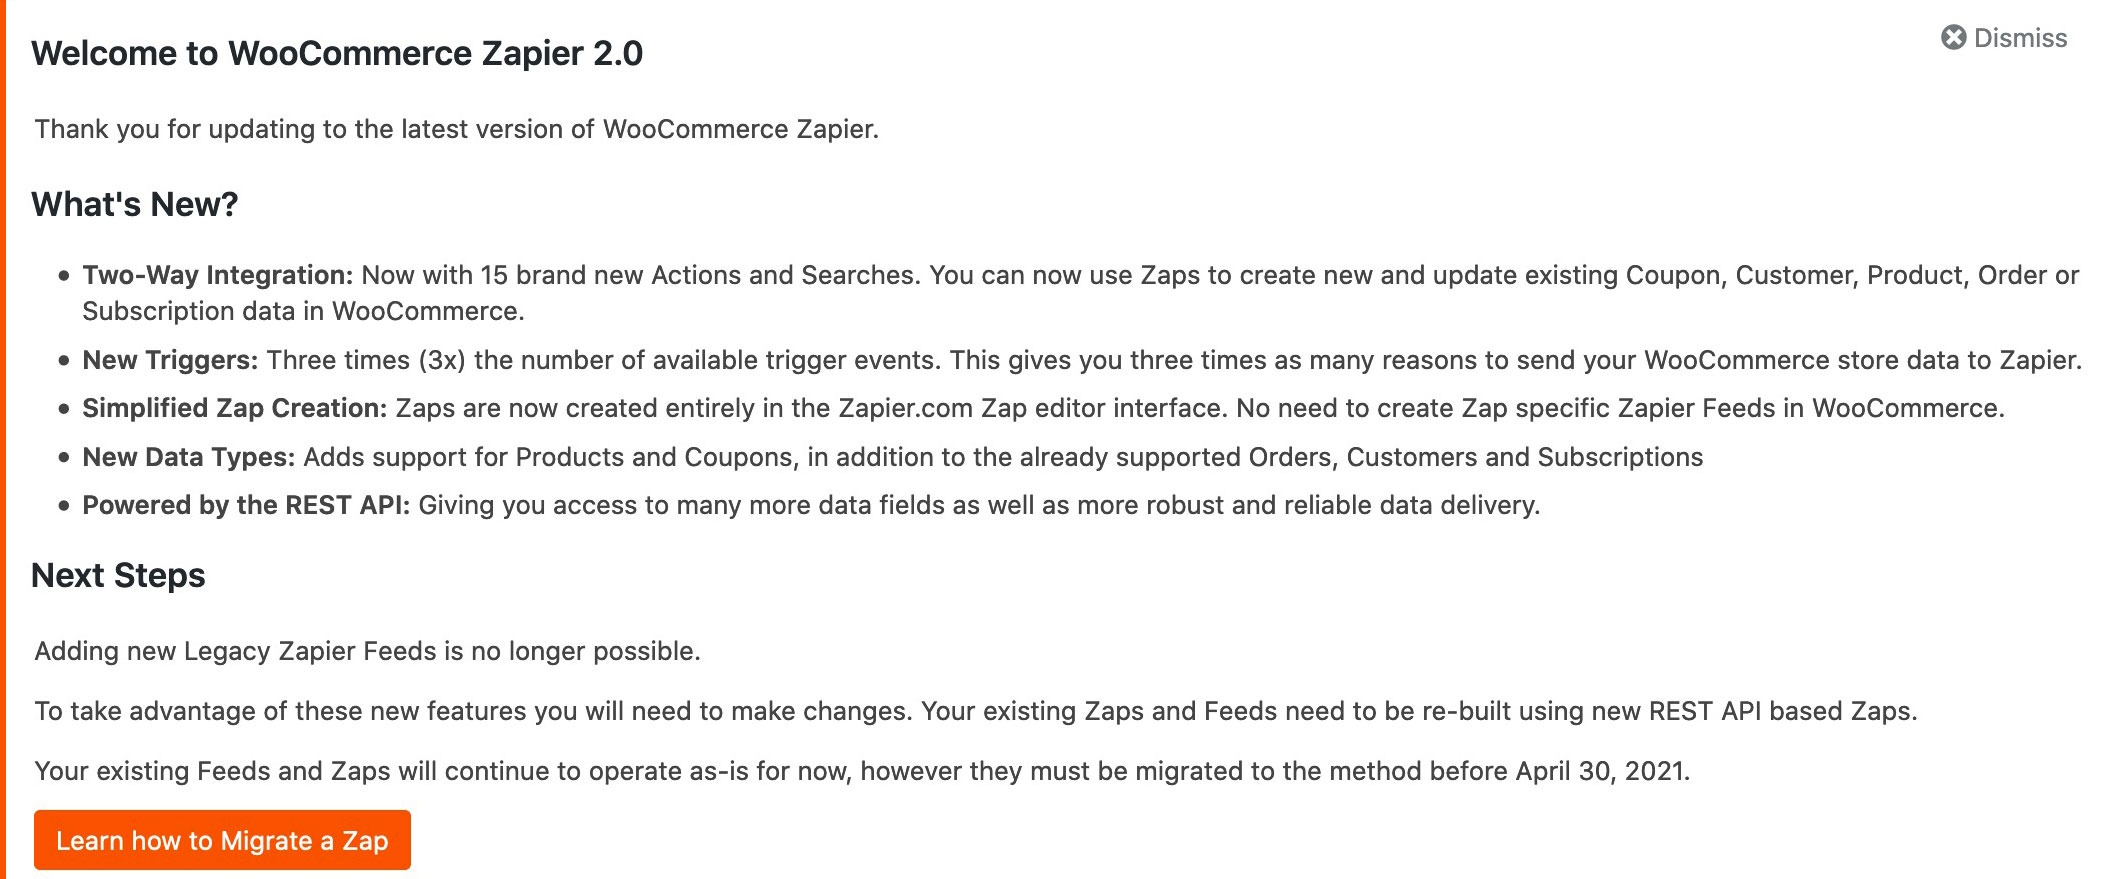
If you want to start migrating to the new connection, please follow the instructions Migrating Legacy Feeds and Zaps.
Tip
Before migrating your Zaps, we strongly advise that you refer to the Migrating Legacy Feeds chapter above.
Data Field Changes
The new data field definitions in version 2 are based on the already established WooCommerce REST API that was built by the WooCommerce core team.
Most field names are the same or very similar, however, there are some differences and changes in fields for users migrating to the new integration. There are also several fields that are no longer available.
The field definitions are retrieved dynamically from your WooCommerce store, based on the used software versions and installed plugins. Please refer to the Data Field Definition chapter for a full list of available fields.
Here are the most important changes in trigger data fields:
| RESOURCE | Old Name | New Name |
|---|---|---|
| Line Item in an Order3 | line_item_meta | line_meta_data |
| Line Item in an Order | order_cart_discount | order_discount_total |
| Order | line_item → item_meta | line_item → meta_data |
| Order | item_count | Not available in version 2 by default. See a solution in the Add “Line Items Count” Field to an Order chapter. |
| Order | line_item → categories | Not available in version 2 by default. See here for a solution. |
| Order | line_item → tags | Not available in version 2 by default. See here for a solution. |
| Order | status_previous | Not available in version 2. |
| Order5 | subscription_idis_subscription_renewal | meta_data_subscription_renewalWhen this field present, the subscription is renewal and the value is the subscription ID. |
| Subscription5 | cart_discount | discount_total |
| Subscription5 | line_item → item_meta | line_item → item_metaSee here for a solution to expand meta data into individual fields. |
| Subscription5 | status_previous | Not available in version 2. |
Meta Data Changes
WooCommerce Zapier version 2 uses a different format for the metadata fields, as it is based on the already established WooCommerce REST API, which uses objects for each meta data item (rather than simple key/values).
Tip
You can access 1.x version compatible key/value fields. See the Meta Data (Custom Fields) chapter for information.
Country Codes vs Country Names
In WooCommerce Zapier version 2, the billing country and shipping country fields are in an ISO 3166-1 alpha-2 format because this is the format that WooCommerce’s REST API uses.
In most use cases, the receiving (action) app uses a 2-letter country code also. However, if you need to convert the country code to a full country name, then you could:
- Add a new step (step 2) to your Zap, choosing Google Sheets as the App and “Lookup Spreadsheet Row” as the action.
- Create a new Google Sheet that contains 2 columns, one for the country code and one for the country name (perhaps based on the table here).
So your Zap would be WooCommerce as the Trigger, then step 2 is a Google Sheets “Lookup Spreadsheet Row” step to retrieve the full country name, and then step 3 in your Zap is your App of your choice which uses the WooCommerce order data from step 1, but the Country Name from Step 2.
Order Line Item Product Categories and Tags Data Fields
If your Legacy Zaps make use of the line_item → categories or line_item → tags data fields for orders, you will need to follow these steps to add a Find Product step to your Zap in order to access the categories → name or tags → name data fields.
WooCommerce Zapier Integration Debugger
The Debugger plugin is no longer required because changing the log level is now included in version 2.
After updating to WooCommerce Zapier version 2, please go to your WordPress Dashboard → Side Menu → Plugins, and look for the WooCommerce Zapier Integration Debugger plugin. If you have it installed, please deactivate and delete it.
Refer to the Plugin Settings chapter for details on how to enable detailed logging if you require it.
Frequently Asked Questions (FAQs)
Do I Have to Do Anything?
Yes, if you do not do anything at all, then all of your existing WooCommerce Zaps will stop working on 30 April 2022. Please complete the migration steps before this date.
This timeframe allows you over a year to migrate to the improved new WooCommerce Zapier app.
How Will I Know That I Have to Do Something?
Existing users who have at least one active Zap have received an email from Zapier with the subject:
[ACTION REQUIRED] New version of our WooCommerce integration
The email looks like this:
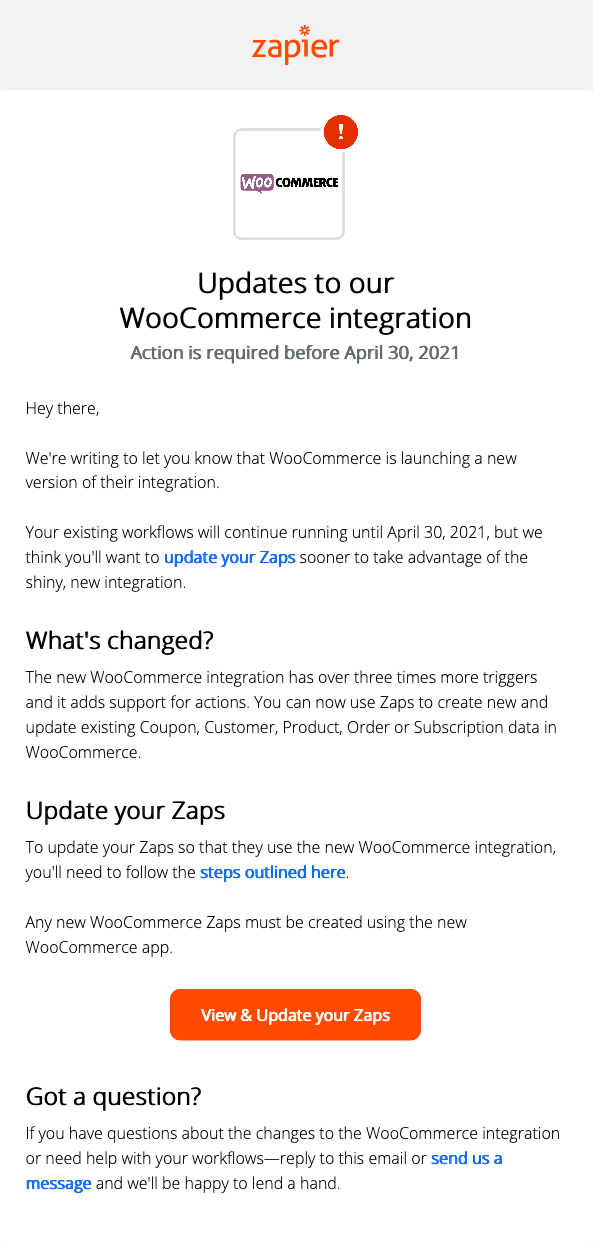
The email has been sent to the Zapier account holder, and not necessarily to the person that purchased the WooCommerce Zapier extension.
Inside your WordPress dashboard, once you update to WooCommerce Zapier version 2, you will see a Welcome to WooCommerce Zapier 2.0 notice that describes what you need to do.
If you received either of the above messages/notices, then you complete the migration steps before 30 April 2022.
Why the Change?
In order to add support for incoming Actions and Searches, the WooCommerce integration to Zapier had to be completely re-written from the ground up using WooCommerce’s REST API.
In order to use the REST API, it was necessary to add authentication to the new WooCommerce app, and in order to do this on the Zapier platform, an entirely new WooCommerce app had to be built on Zapier.
How Long Do I Have?
Legacy Feeds and Zaps must be migrated by 30 April 2022
All Legacy Feeds and Zaps must be migrated to the new WooCommerce Zapier app before 30 April 2022 (2 years after version 2 was released).
Any Zaps using the WooCommerce (Legacy) app after this date are no longer supported.
What Do I Have to Do?
Please refer to our migration instructions for detailed instructions.
Can I Still Use WooCommerce Legacy Feeds and Zaps?
Yes, you can continue to use any existing Feeds until 30 April 2022 if you wish. They can be edited and modified.
However, it is not possible to add new Legacy Feeds or Zaps. New WooCommerce Zaps must be created using the new WooCommerce app, which also requires WooCommerce Zapier plugin version 2 or newer.
What New Features Are Included in the New WooCommerce App?
Please refer to the What’s New in Version 2? chapter for more details on all of the new features in 2.
-
Not required, but recommended for better performance and security. ↩
-
See the WooCommerce REST API documentation for details on how to verify that your REST API is working correctly. The legacy REST API is not required. ↩
-
Default (non-pretty) WordPress permalinks will not work. For further information please refer to the WooCommerce REST API documentation. ↩
-
Only available if the Woo Subscriptions plugin is installed. ↩↩↩↩↩↩↩↩↩↩↩↩