Frequently Asked Questions (FAQs)
Why Are My Zaps Are Not Being Sent?
See the explanation and solution in the No Data is Being Sent to Zapier chapter.
Can I Add Multiple WooCommerce Installations to My Zapier Account?
Yes, you can.
Info
You need to install the WooCommerce Zapier plugin on each of the WooCommerce sites, which typically means purchasing multiple subscriptions for the Zapier Integration so each site can be eligible for updates and support. Each of those sites can be connected to the same Zapier account if you wish.
Do I Need the WooCommerce Legacy API?
WooCommerce Zapier does not use WooCommerce’s Legacy REST API, which has been disabled by default for new WooCommerce installations since WooCommerce version 3.4.
Info
WooCommerce announced in October 2023 that the Legacy REST API will be removed starting with version 9.0. Because we have never used that API, we fully expect our plugin to be compatible with version 9.0.
Can I authenticate with Application Passwords?
Yes! The Zapier Integration does not distinguish between normal WordPress user passwords and WordPress Application Passwords.
We strongly recommend using a WordPress Application Password, if you are using WordPress 5.6 or later, as this maximises compatibility with security plugins and services.
Alternatively. you can use the Application Passwords plugin with older WordPress versions, but third-party compatibility is not guaranteed.
See the Plugin Interface chapter for details on how to set up an application-specific password.
Can I Use WordPress Multisite?
Yes, WordPress multisite is supported!
To connect WooCommerce Zapier to an individual site in a WordPress multisite network, you need to authenticate using a Super Admin user account. You need a separate authentication for each site in your network.
Why is a Super Admin account necessary?
In WordPress Multisite, regular administrators of an individual site can’t edit users (and therefore customers) on the site.
You can use the Application Passwords feature to create a unique password for each site in your multisite network.
An individual WooCommerce Zap can’t be used by multiple individual sites in a multisite network. Instead, you will need separate Zaps for each site. To streamline this process, you can duplicate a Zap once you have created it for the first site. When duplicating, you only need to switch the WooCommerce authentication/account to the other site.
We also suggest setting up a Server Cron Job for each sub-site on your network that uses WooCommerce Zapier.
Tip
You can read about creating and managing a multisite network on WordPress.org in the Create A Network article.
Can I Use a Separate Zap for Each Product in an Order?
Yes! Please see here for details.
Can I Use Variable Products and/or Variations?
Yes, variable products and individual variations are fully supported. Please see the Product Actions and Variable Products sections for full details.
WooCommerce Zapier Plugin Version 2.6 Required
Please ensure you update the WooCommerce Zapier plugin to version 2.6.0 to use this functionality.
What About Order Line Items?
The WooCommerce Zapier plugin includes line item support since version 1.9.0. This includes having full support for handling arrays (lists) of data (such as multiple order line items).
Multiple line items can be used in supported action. For example, you can create an itemised invoice in Quickbooks or Xero with multiple (separate) line items, provided that both Apps support line items.
Alternatively, you can use the Line Item in an Order trigger.
The same is true for all the other “array” type fields. For example in an order the downloadable_files and the notes fields.
Warning
Zapier can support line items for specific apps but does not do so by default, so you’ll want to check to see if the action you want to pair with WooCommerce Zapier has line item support. Most often line item support relates to invoicing and financial apps, but some other apps do have support as well.
Please be careful while setting up the Line Item in an Order trigger. Tasks can be stopped and Zap can be disabled if the order doesn’t have a line item. This typically does not happen on a production site but can be common during development.
I Changed My Website’s URL or Domain Name, What Do I Need to Do?
After changing the URL of your website, please go to Zapier’s My Apps screen, and locate your existing WooCommerce authentication. Click the Reconnect button and re-authenticate with your WooCommerce store’s new URL. This tells Zapier to communicate with your new URL rather than the old URL.
After doing so, we recommend then going to Zapier’s My Zaps screen and editing and reviewing each WooCommerce Zap and testing them to confirm that they are still working as expected.
What Happens if I Did Not Change My Zapier Authentication?
Change site Domain:
- The site continuously sends data to Zapier.
- When you edit a Zap, Zapier runs to an error (because of the old missing URL), and your site stops sending data.
- Your site could not receive any data, and all of your actions will fail.
Copy the site to a new URL:
- Both the old and the new site send data to Zapier.
- Only your old site receives data.
- When you edit a Zap, Zapier notifies the old site about the change, but your new site stops sending data.
Can I Access Subscription Meta Data?
The Subscription resource4 doesn’t natively support accessing a subscription’s meta data.
However, there is a workaround. In your Zap, find the associated order for the subscription, as this order is typically for the initial payment, which often contains the required metadata.
For example:
- Step 1. WooCommerce app → Subscription Resource, and Subscription created Trigger Rule.
- Step 2. WooCommerce app → Find Order action, where the “Order ID” equals the value from the
parent_idfield from the newly created Subscription in Step 1. This finds the original order for the subscription that was just created.
Your subsequent Zap step(s) can then use the data from the Order step (Step 2), rather than the Subscription step (Step 1).
Can I Receive Booking Data?
Yes, the Booking resource1 supports sending booking data from your store to Zapier. See options in Trigger Rules.
It does not support creating or updating Bookings via Zaps, because WooCommerce Bookings itself does not natively support creating or updating Bookings via their REST API endpoints.
If you would like us to add Booking actions as a feature, please see the Can This Extension Do [feature]? section for how to request it.
Can I Access Membership Data?
Yes, the Membership Plan and the User Membership resources3 support sending membership data from your store to Zapier.
It supports creating or updating User Memberships via Zaps, but not for Membership Plans, as WooCommerce Memberships does not natively support creating or updating Membership Plans via their REST API endpoints.
Can This Extension Do [feature]?
New features are added to this extension based on customer demand.
We recommend searching for your idea on the WooCommerce Zapier Feature Requests board.
- If your idea has already been suggested, please add your vote for it.
- If your idea hasn’t already been suggested, post your idea on the Ideas Forum so that others can vote on your idea.
We review WooCommerce Zapier Ideas Forum suggestions regularly and use the votes to understand how many customers are interested in the ideas posted. We then take this into account when planning future releases of WooCommerce Zapier.
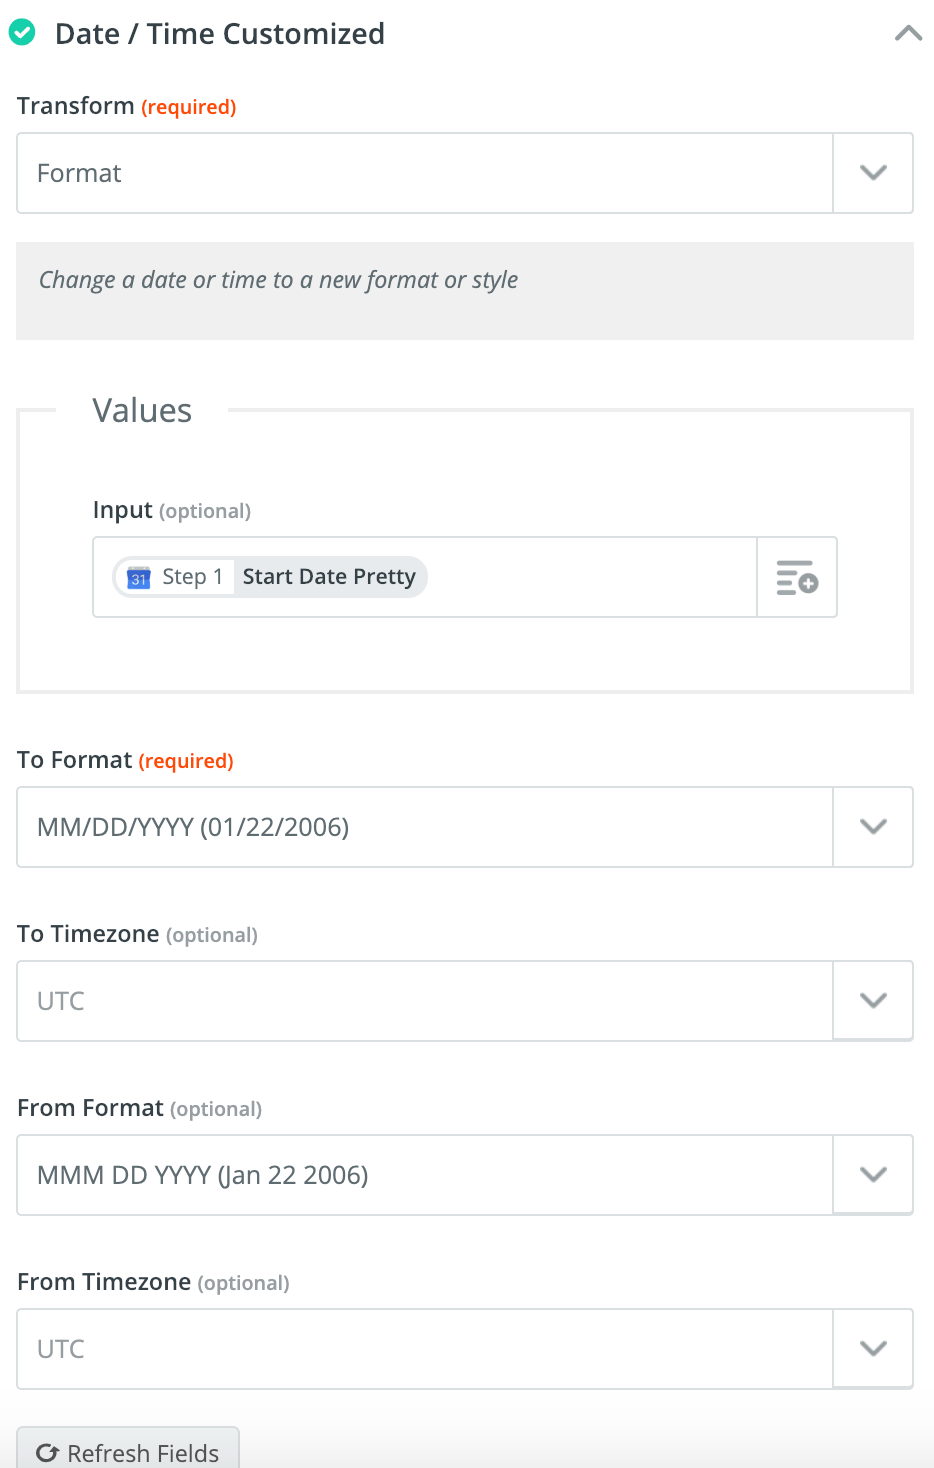
How Can I Change the Format of the Order Date Field?
By default, the Order Date field is supplied in a universal timestamp format (ISO 8601 as per Zapier’s specification).
If required, the date/time format can be changed in your Zap by adding a Formatter action to your Zap. For further reference, see the Formatter chapter.
Can I Send Previous (Historical) Data to Zapier?
After you install and configure WooCommerce Zapier, your Zap(s) you can transfer your data missed through an existing Zap.
What Data is Sent to or Received from Zapier?
Please see the Resources page for full details and Data Field Definitions.
Is My Data Secure?
WooCommerce Zapier always sends and receives your WooCommerce over an HTTPS encrypted connection, which allows a secure connection between your WooCommerce installation and the Zapier.com service.
Your WooCommerce store requires an SSL certificate for this secure connection to operate. Please see System Requirements for more details.
We also recommend familiarizing yourself with Zapier Legal.
Please see the GDPR Compliance chapter for more information on data privacy.
What Data Do You Store?
We, the developers of WooCommerce Zapier do not access, transfer or store any of your customer data whatsoever.
The WooCommerce Extension stores information on all the incoming or outgoing connections. Everything else is transferred as soon as possible from/to Zapier. The data is temporarily stored in memory and/or in a WordPress temporary table.
Please see the GDPR Compliance chapter for more information on data privacy.
What Data Do You Collect?
We, the developer of the Zapier Integration (OM4) do not transfer or store any of your customer data whatsoever. In the event of a support request, we request the WooCommerce status information and may request access to your WooCommerce store and Zapier account.
The WooCommerce Extension is designed to collect and send (or receive) supported Resources data to (or from) the Zapier service. You can see all the data in the Field Definitions tables.
Please see the GDPR Compliance chapter for more information on data privacy.
What Data Do You Share?
The WooCommerce Zapier Extension communicates directly between your WooCommerce store and Zapier. For reference, here are the Zapier Privacy Policy and Automattic (WooCommerce) Privacy Policy pages.
Please see the GDPR Compliance chapter for more information on data privacy.
-
Only available if the WooCommerce Bookings plugin is installed. ↩
-
Only available if the Coupon functionality is enabled in your WooCommerce store. (Enabled by default). ↩
-
Only available if the WooCommerce Memberships plugin is installed. ↩
-
Only available if the Woo Subscriptions plugin is installed. ↩